

In this Solution Guide we will look at reducing an already deployed Azure VM’s OS Disk with the objective of bringing down our Storage Costs:
For this guide I deployed a new VM in Azure:
Something to note, Trusted Launch does not support this process without some more ironing out, so take note only Standard Security was used in this deployment:

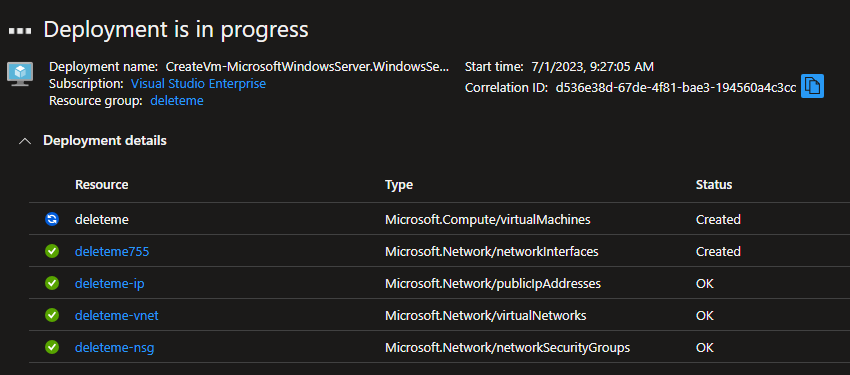
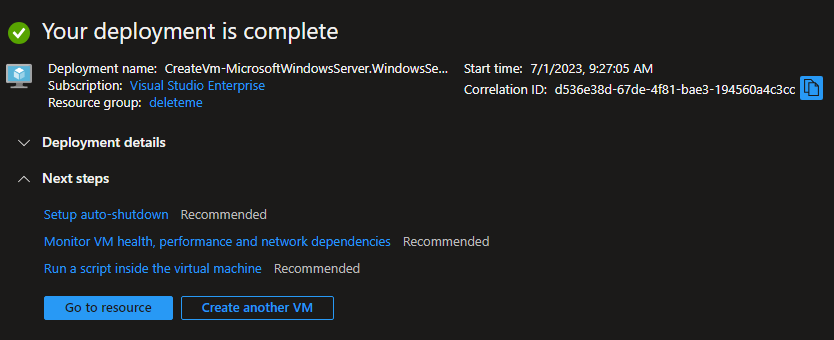
Deployment done:
Now connect to your VM with RDP as we need to resize the OS disk partition before we can make the changes to the physical disk on Azure:

To start off, fire up Disk Management from the Start Menu:

Note down the Disk Number and the Partition Number of the C:\, each VM may differ depending on how it was provisioned.
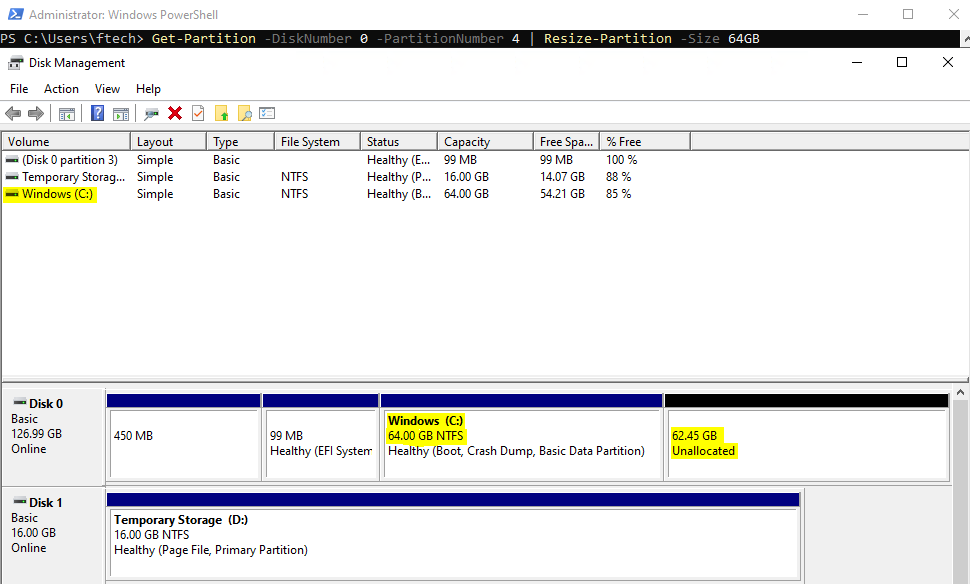
To get the Parition information, you can use PowerShell as well:
Use Get-Partition CMDlet to output the partition information of the OS disk to be reduced, here we can see that Disk 0 and partition 4 is the OS disk partition:
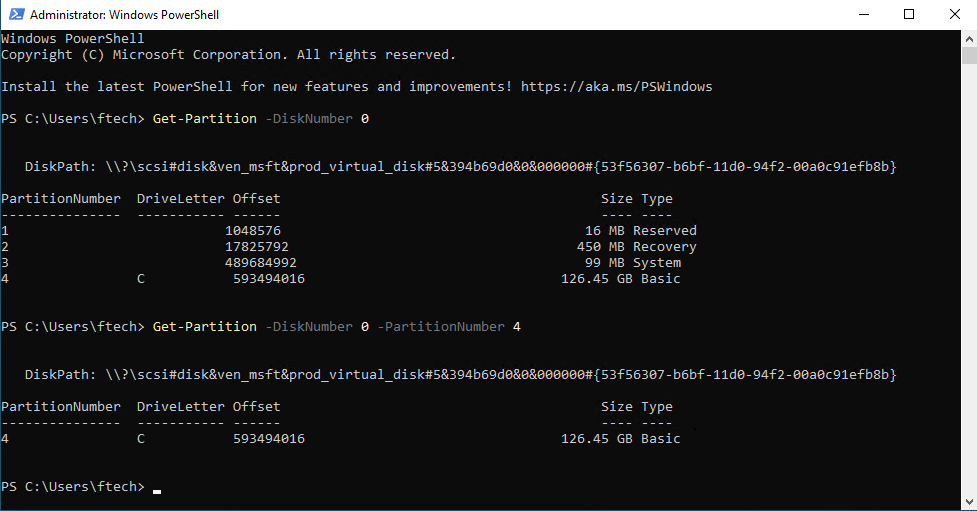
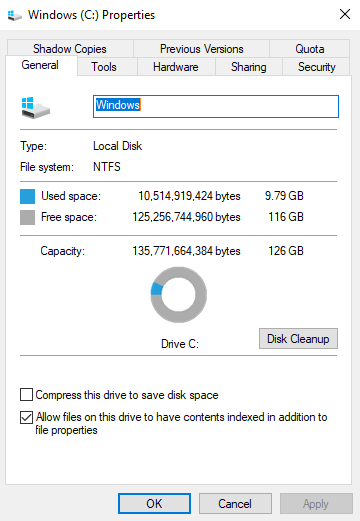
Next we can note what the current utilized disk space is for the OS disk, We are only using 10GB of the full 126GB disk, for this case we can aim to reduce the disk size to 64GB:
To do this we fire up PowerShell and execute the following to reduce the partition structure to 64GB of the OS partition:
Get-Partition -DiskNumber 0 -PartitionNumber 4 | Resize-Partition -Size 64GB
As you can see from the below image, after the command was executed our OS disk has a newly resized partition structure with unnalocated space.
Once you reach this point we need to shut down the VM and de-allocate or Stop the instance in Azure as well

Now that our VM has been deallocated we need to get some information in Azure about the disk we are about to resize, also note the full size before we make any changes:

Navigate to your VM in the Azure portal and select the Disk panel on the left, then navigate to properties and note the full path of the resource ID as shown below:

Ok, we are just about ready to start the resizing process. From your workstation or from Cloud Shell, we need to execute the procedure script, In this example I will use PowerShell, fire it up as Admin:

Download the script here : OS Shrink Script
#################################################################################
# #
# WARNING: Ensure VM backups are in place before executing this procedure #
# Data loss may occur! Please follow with care! #
# #
#################################################################################
# Job Variables for reducing VM Disk sizes
$DiskID = “/subscriptions/xxxxxxx-xxxx-xxxx-xxxx-xxxxxxxxxxxx/resourceGroups/Your-RG/providers/Microsoft.Compute/disks/Your-VM_OsDisk_1_bba2a4c049f84ad9a32352672758558969”
$VMName = “Your VM Name”
$DiskSizeGB = “64” #Enter the new size you would like to resize to
$AzSubscription = “Your Subscription”
$TenantID = “xxxxxxx-xxxx-xxxx-xxxx-xxxxxxxxxxxx”
$SubscriptionID = “xxxxxxx-xxxx-xxxx-xxxx-xxxxxxxxxxxx”
#################################################################################
# #
# Logic for Reducing the OS Disk size of Azure VM #
# #
# #
#################################################################################
# Login to Azure and the associated subscription where your VM is located
Connect-AzAccount -TenantId $TenantID -SubscriptionId $SubscriptionID
# Save the VM name to a variable
$VM = Get-AzVm | ? Name -eq $VMName
# Extract the RG name from the VM variable created previously
$resourceGroupName = $VM.ResourceGroupName
# Extract the Disk ID to be reduced
$Disk = Get-AzDisk | ? Id -eq $DiskID
# Extract the Azure Virtual Machine Generation Type
$HyperVGen = $Disk.HyperVGeneration
# Extract the name of the Disk
$DiskName = $Disk.Name
# Provide Access to the Disk using a SAS Key
$SAS = Grant-AzDiskAccess -ResourceGroupName $resourceGroupName -DiskName $DiskName -Access ‘Read’ -DurationInSecond 600000;
# Create a temporary Storage Account for creating a copy of the Disk to be reduced
Write-Output “creating a temporary disk operation storage account”
$storageAccountName = “temp” + [system.guid]::NewGuid().tostring().replace(‘-‘,”).substring(1,18)
# Create a new container within the Storage Account for saving the Disk to be reduced
Write-Output “creating new Storage Container”
$storageContainerName = $storageAccountName
Write-Output $storageContainerName
# Define the new reduced VHD Disk file that will be created
Write-Output “create new VHD file name”
$destinationVHDFileName = “$($VM.StorageProfile.OsDisk.Name).vhd”
# Specify the the Storage Account context needed to perform the copy operation
Write-Output “Setting Storage Context for next operations”
$StorageAccount = New-AzStorageAccount -ResourceGroupName $resourceGroupName -Name $storageAccountName -SkuName Standard_LRS -Location $VM.Location
$destinationContext = $StorageAccount.Context
$container = New-AzStorageContainer -Name $storageContainerName -Permission Off -Context $destinationContext
# Initialize the Copy of the original VHD file to the new Storage Account, monitor the copy
Write-Output “starting Az copy job and monitor copy status”
Start-AzStorageBlobCopy -AbsoluteUri $SAS.AccessSAS -DestContainer $storageContainerName -DestBlob $destinationVHDFileName -DestContext $destinationContext
while(($state = Get-AzStorageBlobCopyState -Context $destinationContext -Blob $destinationVHDFileName -Container $storageContainerName).Status -ne “Success”) { $state; Start-Sleep -Seconds 20 }
$state
# For security reasons it is suggested to revoke the SAS key generated earlier
Write-Output “revoking disk access”
Revoke-AzDiskAccess -ResourceGroupName $resourceGroupName -DiskName $DiskName
# Clear the new VHD footer
$emptydiskforfootername = “$($VM.StorageProfile.OsDisk.Name)-empty.vhd”
# Define the new parameters which will be used for the new reduced disk
$diskConfig = New-AzDiskConfig `
-Location $VM.Location `
-CreateOption Empty `
-DiskSizeGB $DiskSizeGB `
-HyperVGeneration $HyperVGen
$dataDisk = New-AzDisk `
-ResourceGroupName $resourceGroupName `
-DiskName $emptydiskforfootername `
-Disk $diskConfig
$VM = Add-AzVMDataDisk `
-VM $VM `
-Name $emptydiskforfootername `
-CreateOption Attach `
-ManagedDiskId $dataDisk.Id `
-Lun 63
# Update the Azure VM Disk configuration and attach the new reduced data disk containing the data from the original disk
Write-Output “updating the VM with the new disk information”
Update-AzVM -ResourceGroupName $resourceGroupName -VM $VM
# Create a new SAS token for the new disk
$SAS = Grant-AzDiskAccess -ResourceGroupName $resourceGroupName -DiskName $emptydiskforfootername -Access ‘Read’ -DurationInSecond 600000;
# Move the empy disk to the previously created storage account
Write-Output “exrcute final copy job”
Start-AzStorageBlobCopy -AbsoluteUri $SAS.AccessSAS -DestContainer $storageContainerName -DestBlob $emptydiskforfootername -DestContext $destinationContext
while(($state = Get-AzStorageBlobCopyState -Context $destinationContext -Blob $emptydiskforfootername -Container $storageContainerName).Status -ne “Success”) { $state; Start-Sleep -Seconds 20 }
$state
# For security reasons it is suggested to revoke the SAS key generated earlier
Revoke-AzDiskAccess -ResourceGroupName $resourceGroupName -DiskName $emptydiskforfootername
# Delete the temporary disk created as part of the process
Remove-AzVMDataDisk -VM $VM -DataDiskNames $emptydiskforfootername
Update-AzVM -ResourceGroupName $resourceGroupName -VM $VM
Remove-AzDisk -ResourceGroupName $resourceGroupName -DiskName $emptydiskforfootername -Force;
# Gather and the the context and disk parameters of the new disk
$emptyDiskblob = Get-AzStorageBlob -Context $destinationContext -Container $storageContainerName -Blob $emptydiskforfootername
$osdisk = Get-AzStorageBlob -Context $destinationContext -Container $storageContainerName -Blob $destinationVHDFileName
$footer = New-Object -TypeName byte[] -ArgumentList 512
$downloaded = $emptyDiskblob.ICloudBlob.DownloadRangeToByteArray($footer, 0, $emptyDiskblob.Length – 512, 512)
$osDisk.ICloudBlob.Resize($emptyDiskblob.Length)
$footerStream = New-Object -TypeName System.IO.MemoryStream -ArgumentList (,$footer)
$osDisk.ICloudBlob.WritePages($footerStream, $emptyDiskblob.Length – 512)
$emptyDiskblob | Remove-AzStorageBlob -Force
# Define the new disk
$NewDiskName = “$DiskName” + “-Reduced”
# Ensure the new disk is of the same SKU as the original
$accountType = $Disk.Sku.Name
# Extract the disk URI of the new disk
$vhdUri = $osdisk.ICloudBlob.Uri.AbsoluteUri
# Define the new disk configurations
$diskConfig = New-AzDiskConfig -AccountType $accountType -Location $VM.location -DiskSizeGB $DiskSizeGB -SourceUri $vhdUri -CreateOption Import -StorageAccountId $StorageAccount.Id -HyperVGeneration $HyperVGen
# Create a new Managed Disk from the configuration options
$NewManagedDisk = New-AzDisk -DiskName $NewDiskName -Disk $diskConfig -ResourceGroupName $resourceGroupName
# Set the VM configuration to point to the new disk
Set-AzVMOSDisk -VM $VM -ManagedDiskId $NewManagedDisk.Id -Name $NewManagedDisk.Name
# Update the Original VM with the new disk
Update-AzVM -ResourceGroupName $resourceGroupName -VM $VM
Download the script here : OS Shrink Script
Execute the above by replacing your environment information in the variables portion of the script and hit run.
Here we can see the Resource Group before the execution of the script:

Here we can see the script procedure has create a temp storage account:

After the process completes, note for any errors during the execution of the script. If all has run smoothly you can fire up your VM and login to confirm the VM is operational.
We can see below that we have reduced our VM disk size by 50%!!

After confirming the procedure was a success, we can remove the existing disk and storage account using the below:
# Delete old Managed Disk
Remove-AzDisk -ResourceGroupName $resourceGroupName -DiskName $DiskName -Force;
# Delete old blob storage
$osdisk | Remove-AzStorageBlob -Force
# Delete temp storage account
$StorageAccount | Remove-AzStorageAccount -Force
I hope this information proves usefull!
